Overview
- Quick link to Clients
- This article explains how to add clients.
- Essential fields for adding a client.
- Client Backscreens and what they show
Cab9 Client Managment
The Clients link in the lefthand primary navigation opens on a mouse click. Selecting All offers you a view of all your clients.
If you have many clients, the search to the top right hand is a simple way of finding the client you want. Alternately you may flip the view to a table where the information is presented as a ‘list’.
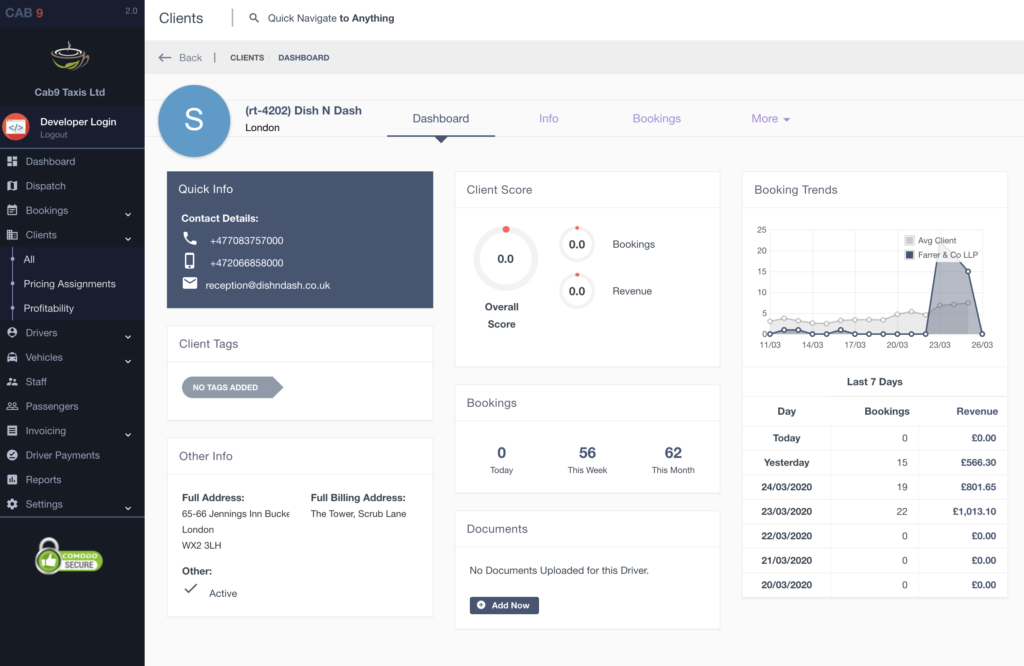
On selecting a client you enter their own mini Dashboard, here we see all the basic client information.

Cab9 has created some system accounts for you. Web Bookings/App Bookings/Cash Bookings/Card Bookings and a Test Account. We suggest using the Test Account for initial set up and experimenting with the system.
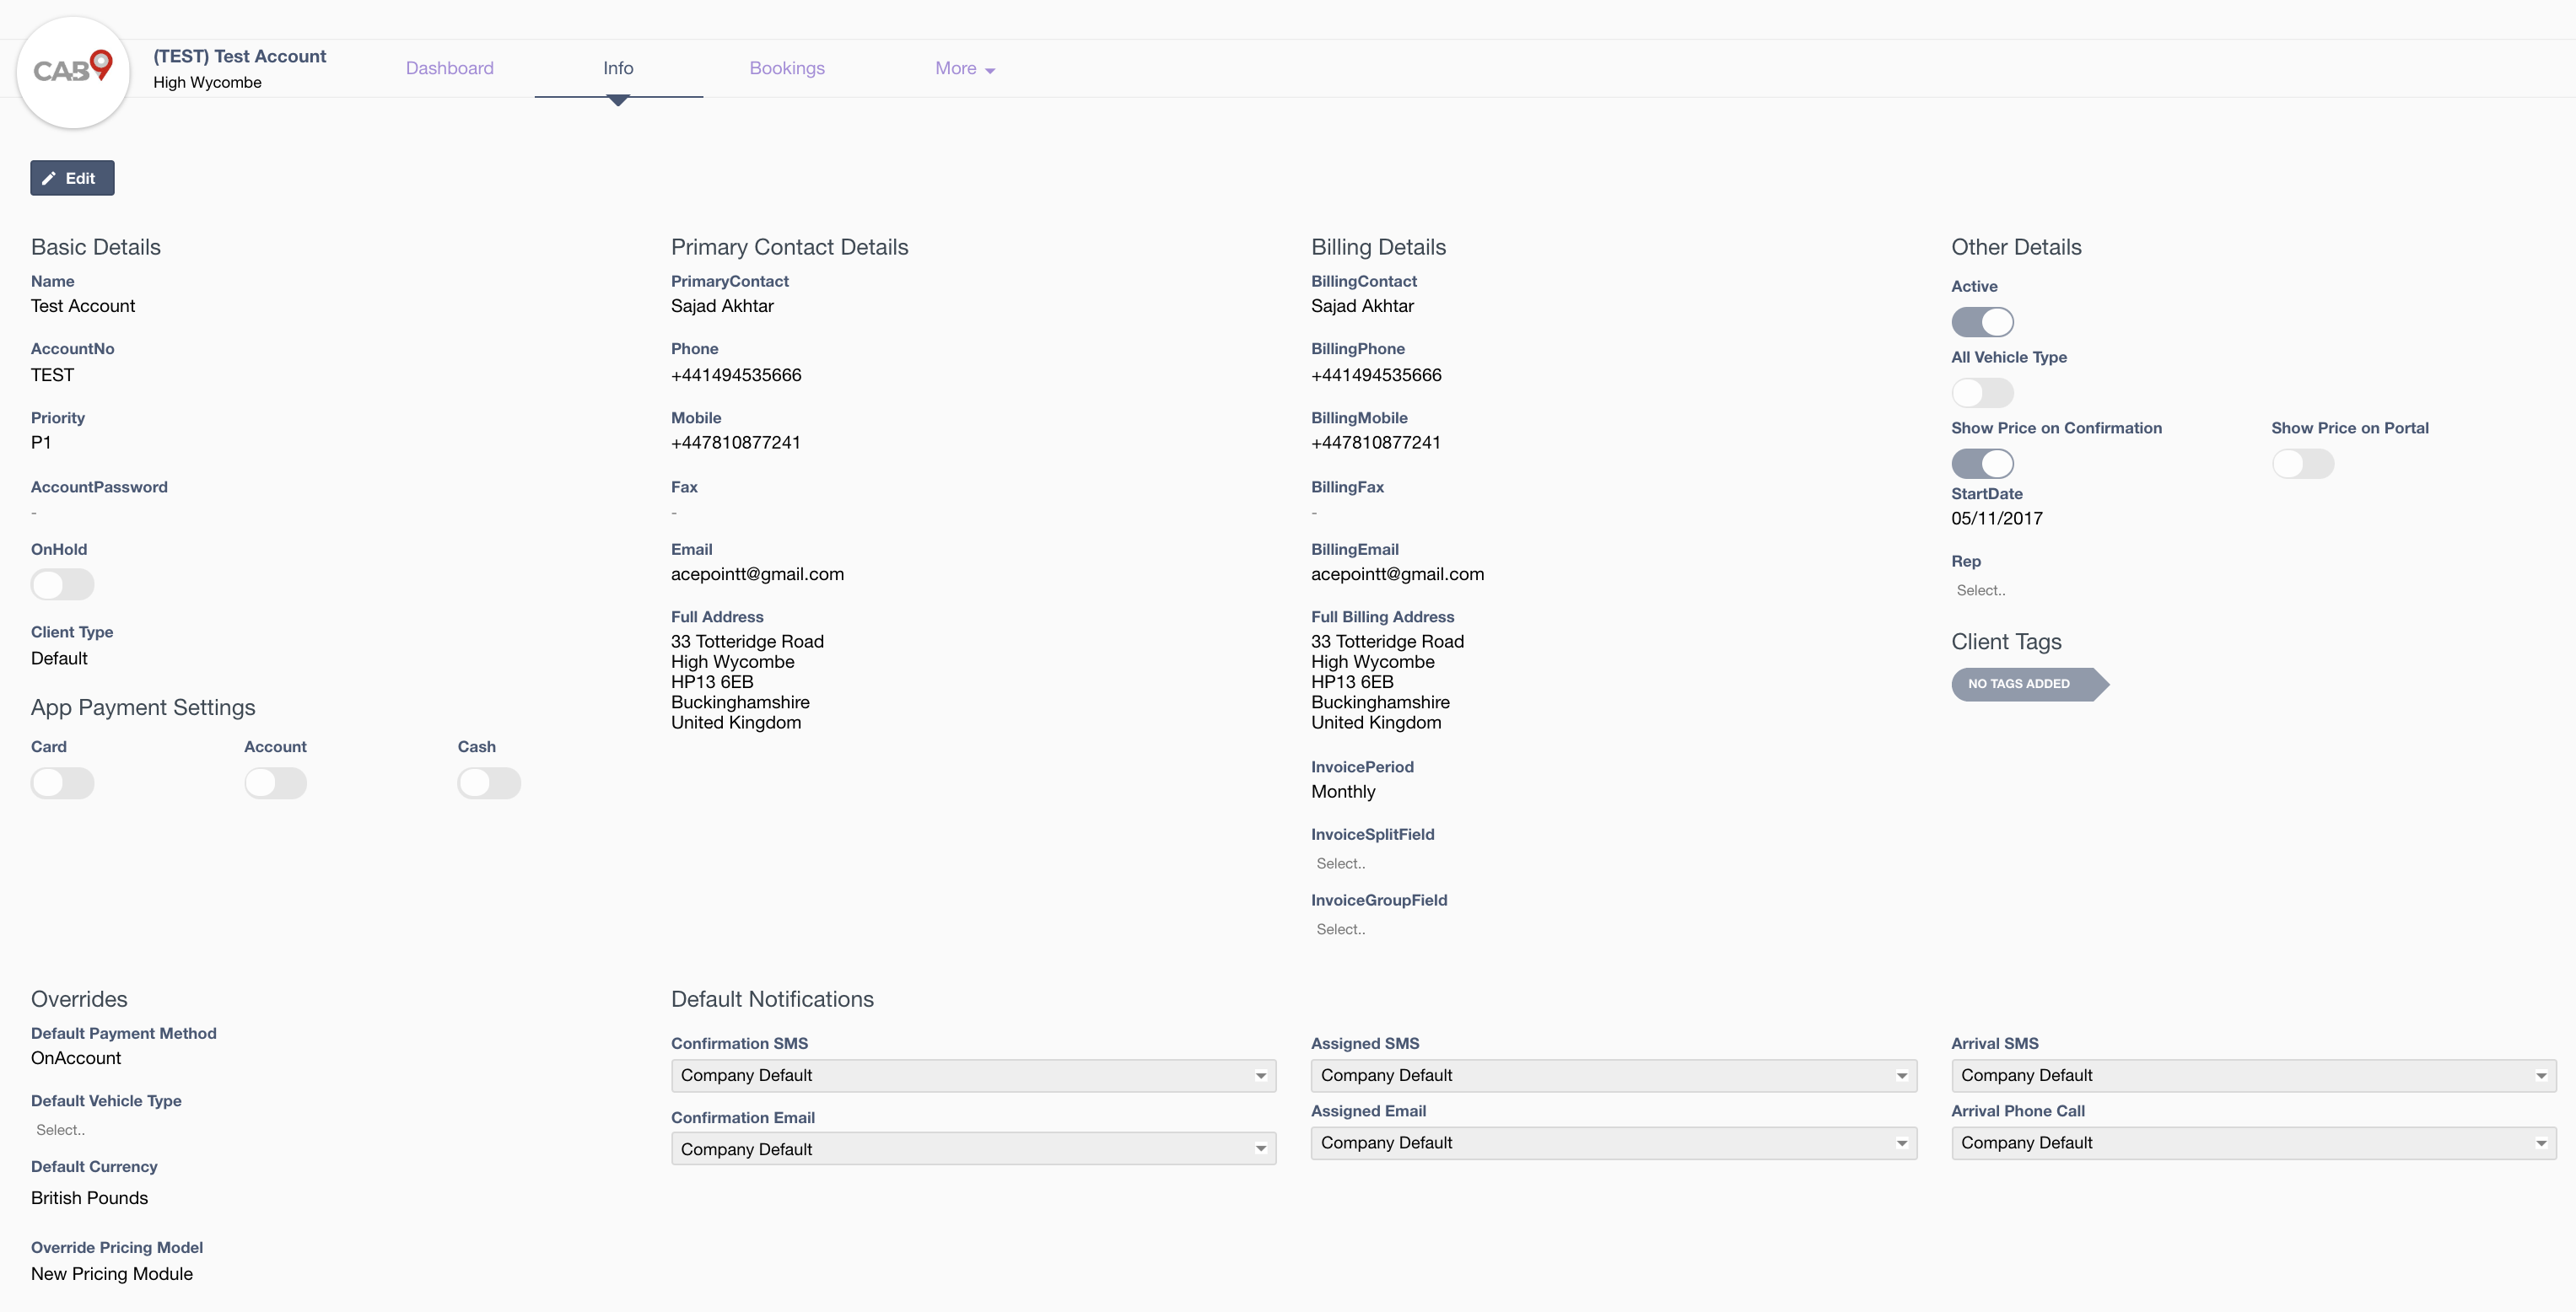
A Clients info page should be populated as fully as possible. What may be a pain now, will save you time in the longer run.

The absolute essentials are :
- Name – The name of the account, used to find the account when making a booking
- Default Payment Method – The default method of payment, whether jobs are invoiced, paid by card, other or cash.
- Default Currency – GBP
- Override Pricing Model – Select a default or custom pricing model for the client, usually a mileage rate, zones or a fixed price from A-B
Here is an explanation for the other available fields on the info page
Any email address entered under primary contact details will be copied on all emails transacted with the account. This is ideal for office managers who like to see who is going where before they get the invoice!
To the right of the screen are toggles for whether the client is active, has access to all vehicle types, or just a specific agreed vehicle type/types.
Show price on notifications is used to determine whether an account client will be advised of the price of a booking on the email confirmation. And show price on portal dictates whether the client sees price information via their web portal.
By default in default notifications, Cab9 notifies a passenger and the booker of a booking with an email and the passenger via text message. Together with an SMS on vehicle arrival for the booking.
Client-specific notifications may be defined in the client screen as system overrides for clients who prefer/do not prefer texts or emails at specific points in the booking process from initiation to completion.
Invoice period dictates the period that Cab9 offers to invoice for. Invoice Split allows a separate invoice to be produced for the client for, say each reference, cost code or department. And invoice group field allows the invoice to be grouped and subtotalled by reference, cost code or department.
The top menu allows you to see Back Screens for the client.
From the top menus you can also view any bookings for that client, and under the more tab you can view :
- Staff – Managing account staff, assigning login credentials for clients to access their web portal
- Documents – Copies of contracts, SLA and any agreed rates may be stored here
- Passengers – Passengers assigned to this account
- Profiles – Housekeeping for passengers with similar names. Remove annoying duplicates.
- References – Client specific reference setups
- Notes – Freehand notes on the client
- Blocked – Drivers blocked from this account
- Invoices – Invoices raised against this account
- Credit Notes – Credit notes raised against this account
- Adjustments – Surcharges or discounts applied to the account, whether at invoice or booking level
- Fixed Prices – Fixed agreed prices for this client
- Locations – known locations for this client
- Web Booker – client web portal set up
- History – Audit history of changes to the account.
- Advanced – bulk repricing.
- Credit Cards – Add a credit card to the account to pay invoices.
- Invite to App – Select passengers to receive an ‘invite to the passenger app’
- Vehicle Types – restrict available vehicle types for this account.
Next Steps
- This article shows you how to add drivers

